Bootstrap Header Content
Introduction
Like in printed documents the header is just one of the more critical elements of the webpages we get and build to apply every day. It safely and securely possesses probably the most critical information relating to the identity of the organisation or individual behind the web page in itself and the importance of the whole web site-- its navigation system which in turn along with the Bootstrap Header Form itself must be thought and crafted in such technique that a visitor in a hurry or certainly not actually realising which way to go to merely take a view at plus get the wanted info. This is the suitable circumstances-- in the real life making as near as feasible to this look and attitude also goes on given that we almost every moment have some project particular limits to think about. In addition compared with the written documents around the world of web we should really always remember the variety of possible gadgets on which our pages could actually get featured-- we ought to ensure their responsive behavior or in other words-- make certain they will present optimal at any screen size attainable.
So let us have a glance and discover ways a navbar gets created in Bootstrap 4. ( visit this link)
The best way to make use of the Bootstrap Header Content:
Firstly if you want to develop a page header or else given that it gets knowned as within the framework-- a navbar-- we ought to wrap the whole thing inside a
<nav>.navbar.navbar-toggleable- ~ screen size ~.bg-*.navbar-light.navbar-lightWithin this parent element we should certainly start by setting a button element which in turn will be applied to reveal the collapsed content on a smaller sized screen dimensions-- to complete that produce a
<button>.navbar-toggler.navbar-toggler-left.navbar-toggler-righttype = " button "data-toggle ="collapse"data-target = " ~ the collapse element ID ~What is certainly bright fresh for most current alpha 6 release of the Bootstrap 4 framework is that inside the
.navbar-togler<span>.navbar-toggler-icon<a>.navbar-brand<div class="img"><img></div>Now-- the main element-- making the collapsible container for the main site navigation-- to accomplish it create an element through the
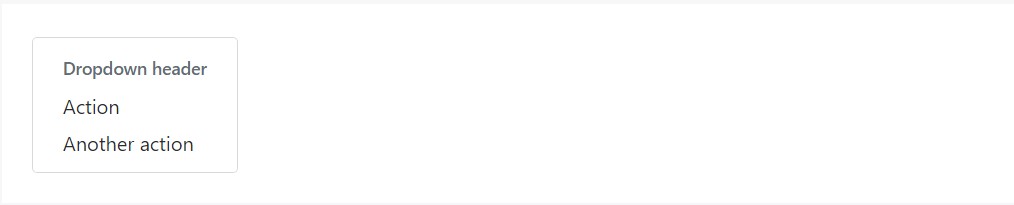
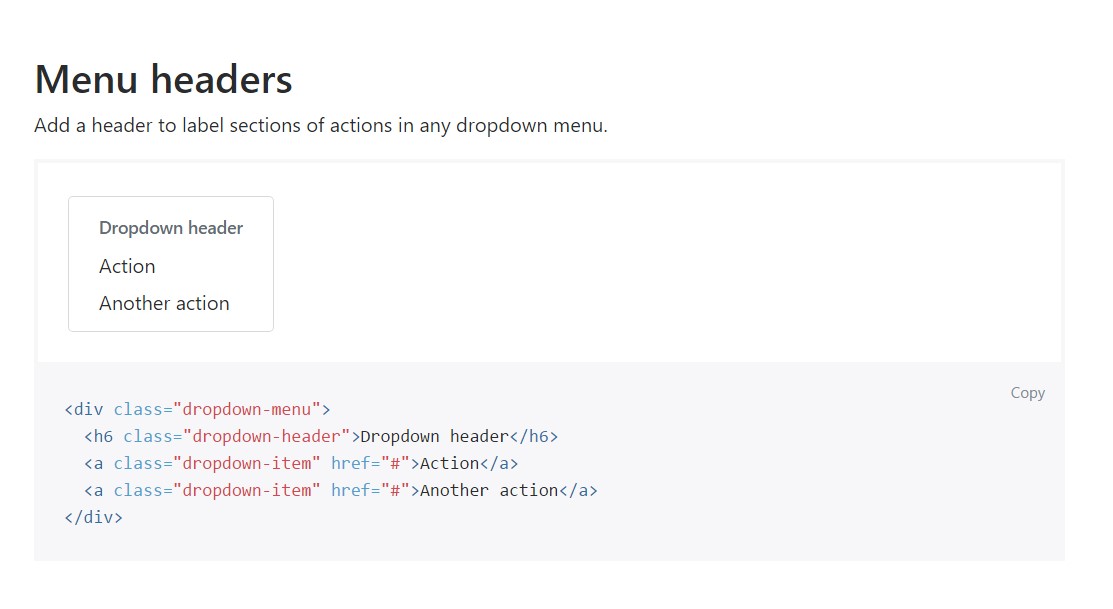
.collapse.navbar-collapseid =" ~ same as navbar toggler data-target ~ ".collapse<ul>.navbar-nav<ul><li>.nav-item<a>.nav-link.nav-item.nav-link.nav-item.dropdown<li>.dropdown-toggle.nav-link.nav-item<div>.dropdown-menu.dropdown-itemFor example of menu headers
Provide a header to label areas of activities into any dropdown menu.
<div class="dropdown-menu">
  <h6 class="dropdown-header">Dropdown header</h6>
  <a class="dropdown-item" href="#">Action</a>
  <a class="dropdown-item" href="#">Another action</a>
</div>
Other options
An additional brand-new feature for this version is the option to bring in an inline forms in your
.navbar.form-inline<span>.navbar-textConclusions
When it involves the header parts in current Bootstrap 4 version this is being simply dealt with with the built in Collapse plugin and various site navigation certain material classes-- a few of them built specifically for keeping your brand's identity and various other-- to get certain the real webpage navigational system will show best collapsing in a mobile phone style menu when a pointed out viewport size is reached.
Look at a few on-line video tutorials regarding Bootstrap Header
Related topics:
Bootstrap Header: approved information
Bootstrap Header article
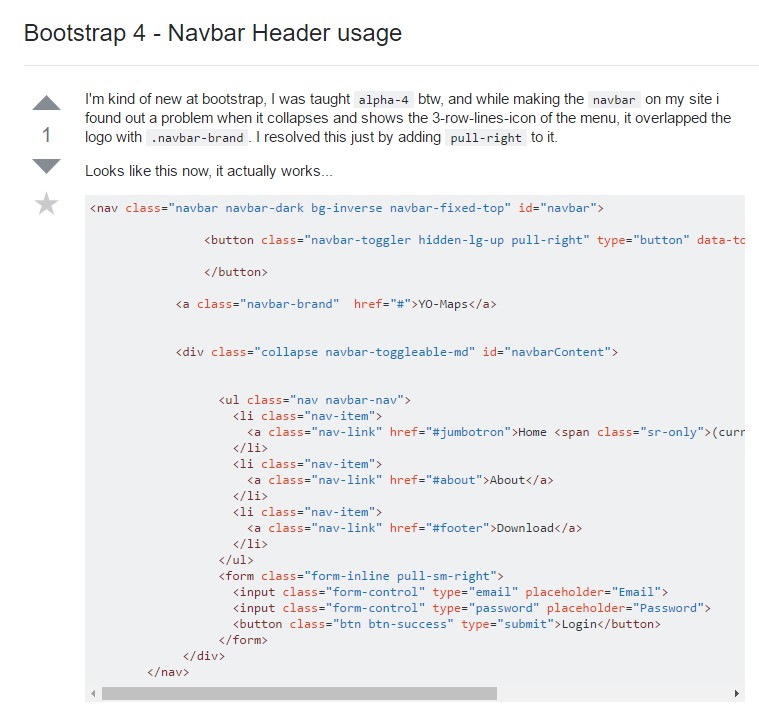
Bootstrap 4 - Navbar Header application