Bootstrap Popover Placement
Introduction
The versions
Bootstrap is one of the most free and useful open-source platforms to develop websites. The latest version of the Bootstrap platform is known as the Bootstrap 4.
Usefulness of the Bootstrap 4
Together with Bootstrap 4 you have the ability to generate your web site now much faster than ever before. It is comparatively very much easier to apply Bootstrap to design your website than various other systems. Together with the integration of HTML, CSS, and JS framework it is one of the most popular programs for website growth.
A number of features plus techniques in Bootstrap 4
A couple of the best capabilities of the Bootstrap 4 feature:
• An improved grid complex that permits the user to obtain mobile device responsive web sites along with a fair amount of easiness.
• A number of utility guidance sets have been provided in the Bootstrap 4 to promote simple learning for starters in the business of website design.
Factors to notice
Step 2: Rewrite your article by highlighting words and phrases.
Along with the start of the new Bootstrap 4, the connections to the previous variation, Bootstrap 3 have not been absolutely renounced. The designers have made certain that the Bootstrap 3 does get frequent upgrade and error resolve together with improvements. It will be performed even after the final release of the Bootstrap 4. Bootstrap 3 have not been completely cut off. The developers have provided that the Bootstrap 3 does get regular improve and bug fixes along with improvements.
Differences between Bootstrap 4 and Bootstrap 3
• The assistance for many different web browsers as well as operating systems has been featured in the Bootstrap 4
• The overall sizing of the font is increased for convenient watching and web advancement experience
• The renaming of a variety of elements has been completed to guarantee a quicker and more dependable web-site development method
• Together with brand new customizations, it is achievable to build a extra active website along with minimal efforts
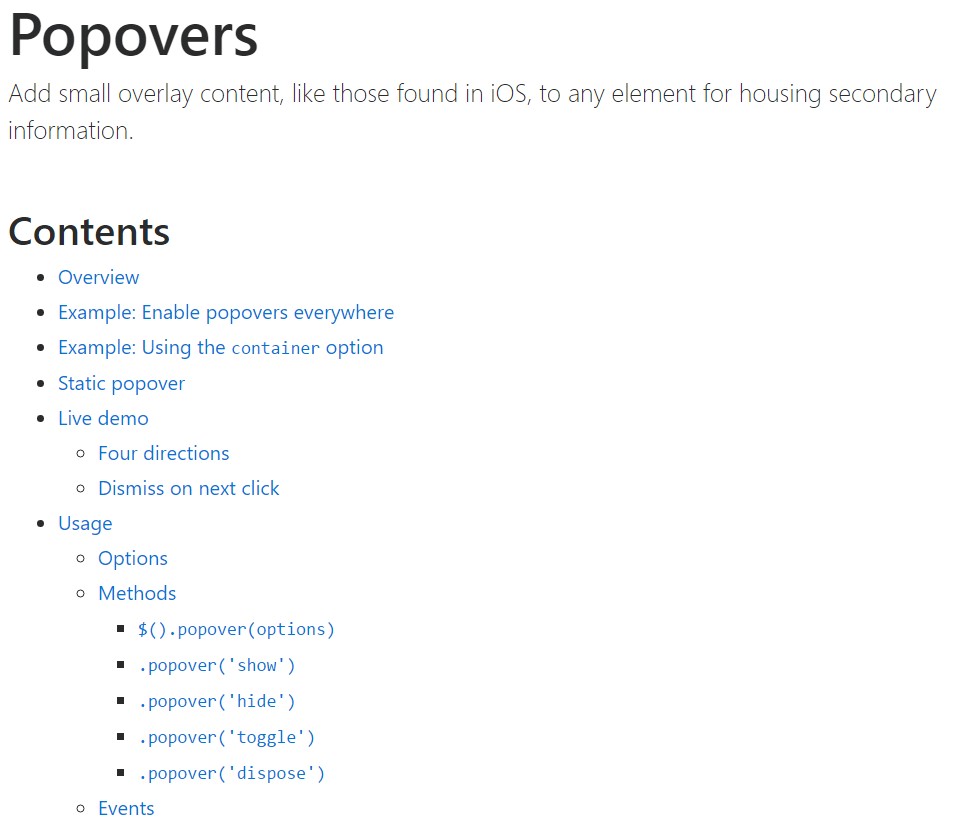
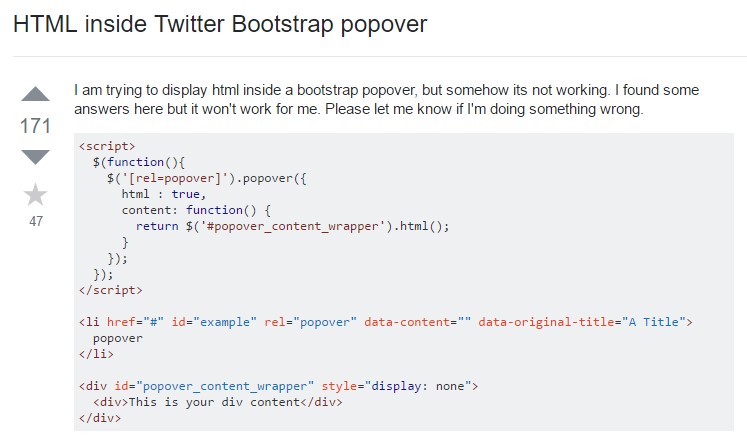
Bootstrap Popover HTML
And promptly let us arrive at the major material.
Supposing that you desire to include special backup details on your web site you are able to employ popovers - simply put in compact overlay content.
How to apply the popover plugin:
- Bootstrap Popover Options lean upon the 3rd party library Tether for installing. You must utilize tether.min.js just before bootstrap.js straight for popovers to work!
- Popovers need the tooltip plugin considering that a dependence .
- Popovers are opt-in for performance reasons, and so you will need to activate them by yourself.
- Zero-length
titlecontent- Indicate
container:'body'- Producing popovers on hidden features will not work.
- Popovers for
. disableddisabledwhite-space: nowrap;<a>Did you understood? Good, let's discover the way they work with some cases. ( additional hints)
You will need to incorporate tether.min.js right before bootstrap.js in turn for popovers to perform!
Example: Implement popovers all over
One method to initialize each of popovers on a webpage would definitely be to select them by their
data-toggle$(function ()
$('[data-toggle="popover"]').popover()
)Good example: Making use of the container option
Whenever you provide certain designs on a parent component that meddle with a popover, you'll desire to define a custom
container$(function ()
$('.example-popover').popover(
container: 'body'
)
)Static popover
Four opportunities are available: high point, right, lowest part, and left aligned.
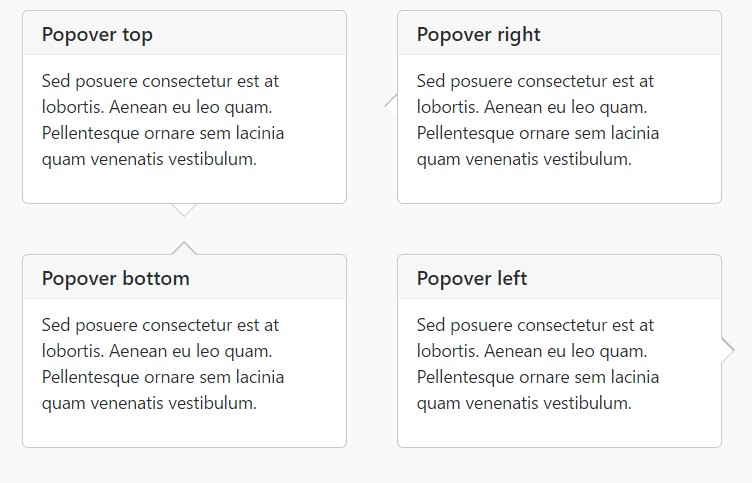
Live demo
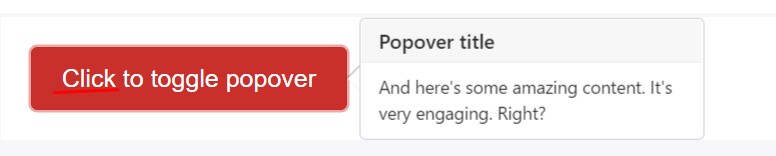
<button type="button" class="btn btn-lg btn-danger" data-toggle="popover" title="Popover title" data-content="And here's some amazing content. It's very engaging. Right?">Click to toggle popover</button>Four trajectories

<button type="button" class="btn btn-secondary" data-container="body" data-toggle="popover" data-placement="top" data-content="Vivamus sagittis lacus vel augue laoreet rutrum faucibus.">
  Popover on top
</button>

<button type="button" class="btn btn-secondary" data-container="body" data-toggle="popover" data-placement="right" data-content="Vivamus sagittis lacus vel augue laoreet rutrum faucibus.">
  Popover on right
</button>

<button type="button" class="btn btn-secondary" data-container="body" data-toggle="popover" data-placement="bottom" data-content="Vivamus
sagittis lacus vel augue laoreet rutrum faucibus.">
  Popover on bottom
</button>

<button type="button" class="btn btn-secondary" data-container="body" data-toggle="popover" data-placement="left" data-content="Vivamus sagittis lacus vel augue laoreet rutrum faucibus.">
  Popover on left
</button>
Dismiss upon next click
Apply the
focusTargeted markup demanded for dismiss-on-next-click
For proper cross-browser and cross-platform actions, you will need to apply the
<a><button>tabindex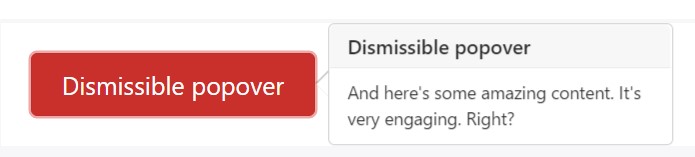
<a tabindex="0" class="btn btn-lg btn-danger" role="button" data-toggle="popover" data-trigger="focus" title="Dismissible popover" data-content="And here's some amazing content. It's very engaging. Right?">Dismissible popover</a>$('.popover-dismiss').popover(
trigger: 'focus'
)Usage
Empower popovers with JavaScript
$('#example').popover(options)Methods
Options may possibly be pass on by using data attributes or JavaScript. For information attributes, attach the option name to
data-data-animation=""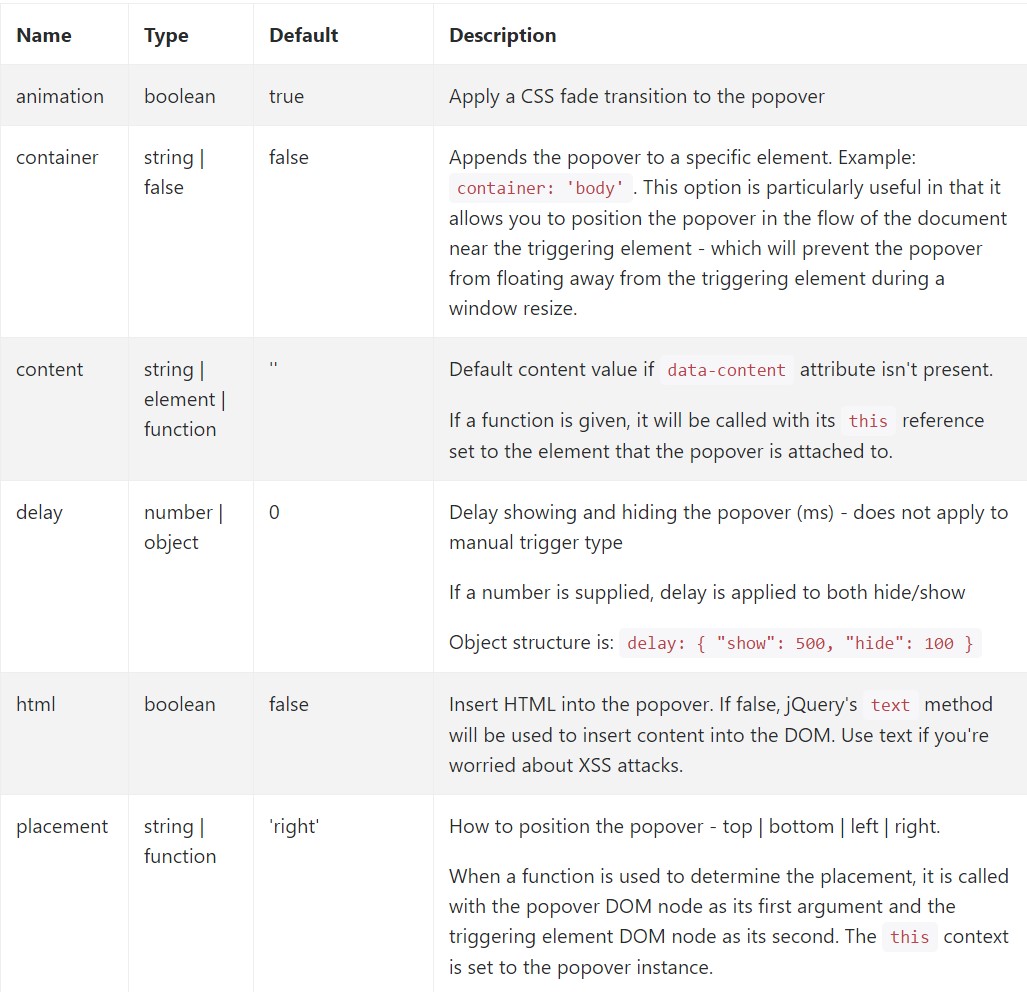
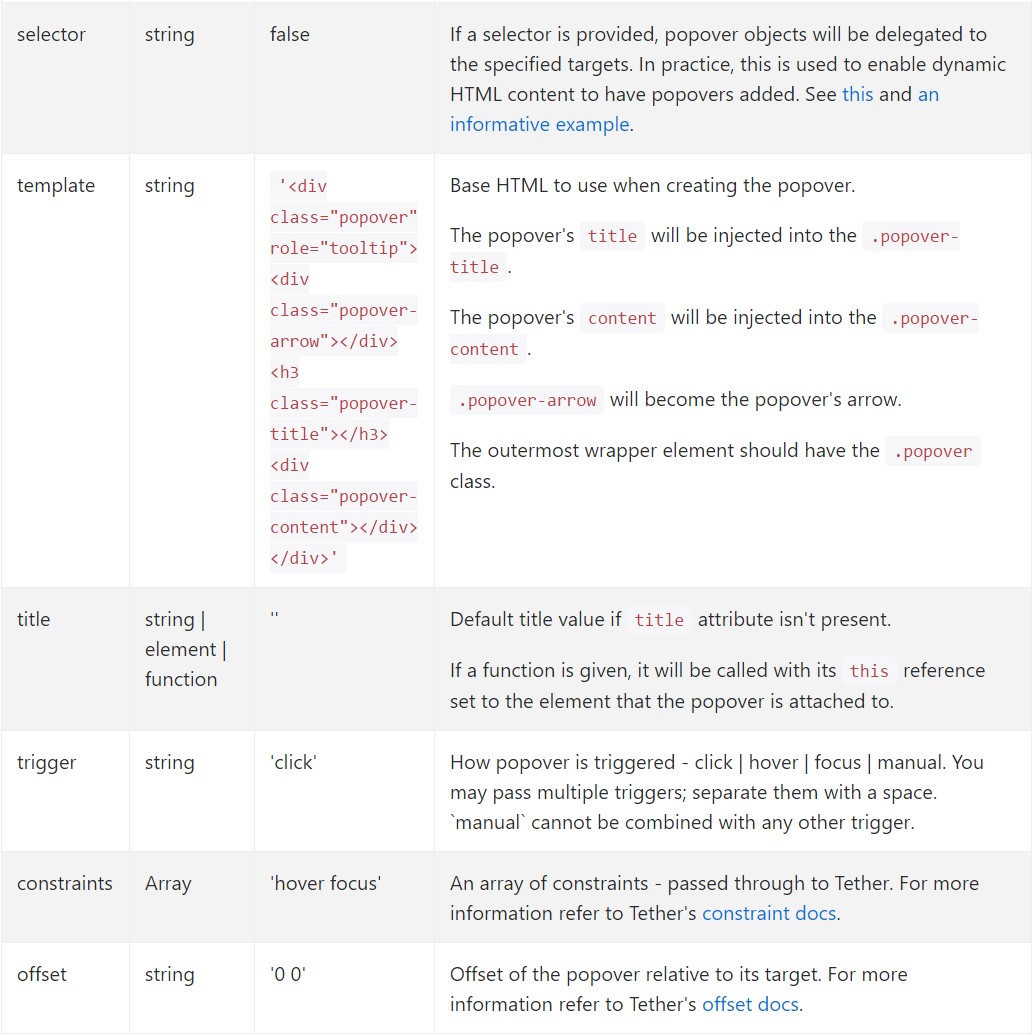
Data attributes for various popovers
Selections for specific popovers are able to alternatively be specified through the use of data attributes, being revealed above.
Approaches
$().popover(options)
Initializes popovers with regard to the component selection.
.popover('show')
Exposes an element's popover. Go back to the user just before the popover has actually been presented (i.e. prior to the shown.bs.popover
event occurs). This is considered a "manual" triggering of the popover. Popovers whose each title and material are zero-length are never shown.
$('#element').popover('show')
.popover('hide')
Conceals an element's popover. Returns to the caller just before the popover has really been hidden (i.e. prior to the hidden.bs.popover
activity happens). This is looked at a "manual" triggering of the popover.
$('#element').popover('hide')
.popover('toggle')
Activate an element's popover. Comes back to the user just before the popover has really been shown or concealed (i.e. right before the shown.bs.popover
or hidden.bs.popover
activity happens). This is looked at a "manual" triggering of the popover.
$('#element').popover('toggle')
.popover('dispose')
Disguise and destroys an element's popover. Popovers which use delegation ( that are established using the selector possibility) can not be separately gotten rid of on descendant trigger components.
$('#element').popover('dispose')
Events
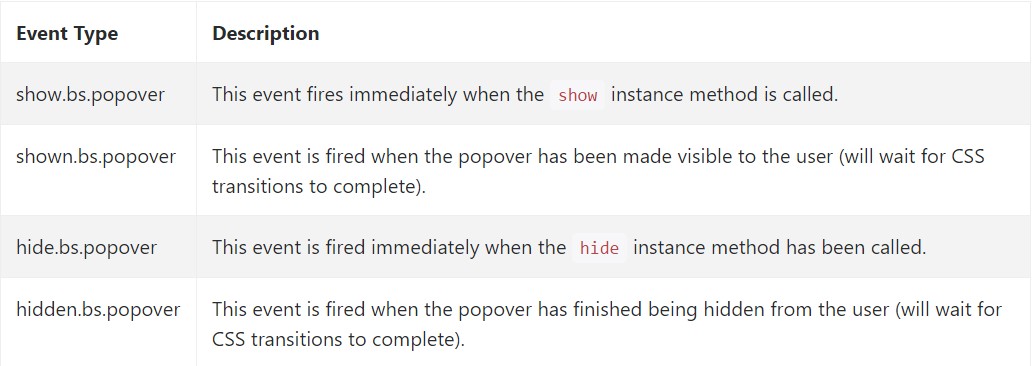
$('#myPopover').on('hidden.bs.popover', function ()
  // do something…
)
Examine some video information relating to Bootstrap popovers
Related topics:
Bootstrap popovers main information
Bootstrap popovers training

Bootstrap Popover issue
$().popover(options)
Initializes popovers with regard to the component selection.
$().popover(options).popover('show')
Exposes an element's popover. Go back to the user just before the popover has actually been presented (i.e. prior to the .popover('show')shown.bs.popover$('#element').popover('show').popover('hide')
Conceals an element's popover. Returns to the caller just before the popover has really been hidden (i.e. prior to the .popover('hide')hidden.bs.popover$('#element').popover('hide').popover('toggle')
Activate an element's popover. Comes back to the user just before the popover has really been shown or concealed (i.e. right before the .popover('toggle')shown.bs.popoverhidden.bs.popover$('#element').popover('toggle').popover('dispose')
Disguise and destroys an element's popover. Popovers which use delegation ( that are established using the selector possibility) can not be separately gotten rid of on descendant trigger components.
.popover('dispose')$('#element').popover('dispose')Events
$('#myPopover').on('hidden.bs.popover', function ()
// do something…
)Examine some video information relating to Bootstrap popovers
Related topics:
Bootstrap popovers main information
Bootstrap popovers training
Bootstrap Popover issue